Getting started with Eduponics Mini
Before we get started - we need to get our programming environment ready, this includes installing some tools and drivers. It won't take long, just follow along with the guide and you should be ready in no time!
Connecting the kit to the power
The Eduponics Mini board includes 2 power interfaces.
- DC 12V Power interface
- USB Type-C 5V Power interface
It's possible to power the board only by 5V USB Type C through one of the USB ports available on your computer or through an external USB hub.
The USB Type-C should be used only for programming and not be used for general operation as the voltage is not enough to power some of the development board functionalities such as the 12V pump.
Once you've finished programming, use the 12V power adapter to power your project, some modules and sensors such as the water pump and the relay require 12V, the inability to provide 12V input, and trying to use those sensors might cause instability and unexpected results.
Powering the board by 12V and 5V power at the same time is completely safe and won't cause any damage to the board.
Only use Eduponics mini supplied DC Power adapter
Our Eduponics Mini 12V2A power adapter is RoHs, CE and FCC certified.
The power adapter passed the most critical tests to ensure your safety and the safety of your project. The use of any other unofficial power adapter might result in damage to you or your project and we are not liable for the outcome
Installing USB TTL Drivers
The USB TTL Serial cables are a range of USB to serial converter cables which provide connectivity between USB and serial UART interfaces,
In our kit, we include a USB Type-C cable that can communicate with the Eduponics Mini board to upload or download code into and from the ESP32 microcontroller that we use in our Eduponics mini kit.
The Eduponics mini UART (serial communication) port is based on the CH340C driver which is the USB to TTL chip we are using. In order to make sure your computer can read and write to and from the Eduponics mini ESP32 kit we need to make sure we have the appropriate drivers installed
Some computers might include support for it but some don't, if it doesn't work for you right away you might need to follow the instructions to install the driver.
Windows and OSX drivers automatically installed
If you have Windows or Mac system, The latest version of the Universal Driver should be automatically installed from a Windows Update or included with the OSX System pre-installed. On other systems you might need to download and install the drivers manually.
SparkFun Electronics created a fabulous video that explains step by step how to get the driver installed on your machine. Follow the video below if you're having difficulties with your drivers and learn how to install the driver on your Windows, Mac, or Linux machine:
The link to the tutorial can be found here: SparkFun how to install CH340C driver
System reboot might be required
When the installation is finished, a restart (reboot) to your system might be required in order for the driver to function properly.
IDE or Code Editor

The term “IDE” stands for "Integrated Development Environment". It is intended as a comprehensive toolset including a text editor, compiler, build/make integration, debugging and so on. Virtually all IDEs are tied specifically to a language or framework or a tightly collected set of languages or frameworks. Some examples: Visual Studio for .NET and other Microsoft languages, RubyMine for Ruby, IntelliJ for Java, XCode for Apple technologies.
An editor is simply that, a tool that is designed to edit text. Typically they are optimized for programming languages though many programmer’s text editors are branching out and adding features for non-programming text like Markdown 108 or Org Mode 88. The key here is that text editors are designed to work with whatever language or framework you choose.
There are many available IDEs and code editors that support MicroPython, In STEMinds we prefer to use the Thonny IDE for the purpose of programming this kit and if you are a beginner and you'll see why.
Inside the Thonny IDE, which is available both for Mac OSX, Windows and Linux; We can configure our Eduponics Mini to work right out of the box.
The IDE allows us to communicate through UART directly, upload code, run code, and manage existing files on the Eduponics Mini.
With the Thonny IDE you can run, manage and execute files directly in an easy, convenient and fast way.
You can download Thonny IDE from here: Thonny IDE official website
Configuring Eduponics mini with Thonny IDE
The first thing you should to do is to connect the Eduponics Mini to your PC/Mac using the USB Type-C cable.
Remember, the USB Type-C cable is the data cable we will use to write/read data from the Eduponics Mini kit while the DC power adapter is used to power the board, particularly the 12V pump.
Once we've connected the Eduponics Mini board - drivers should be installed automatically, if you have an old operating system you can install them manually using the instructions we've mentioned earlier.
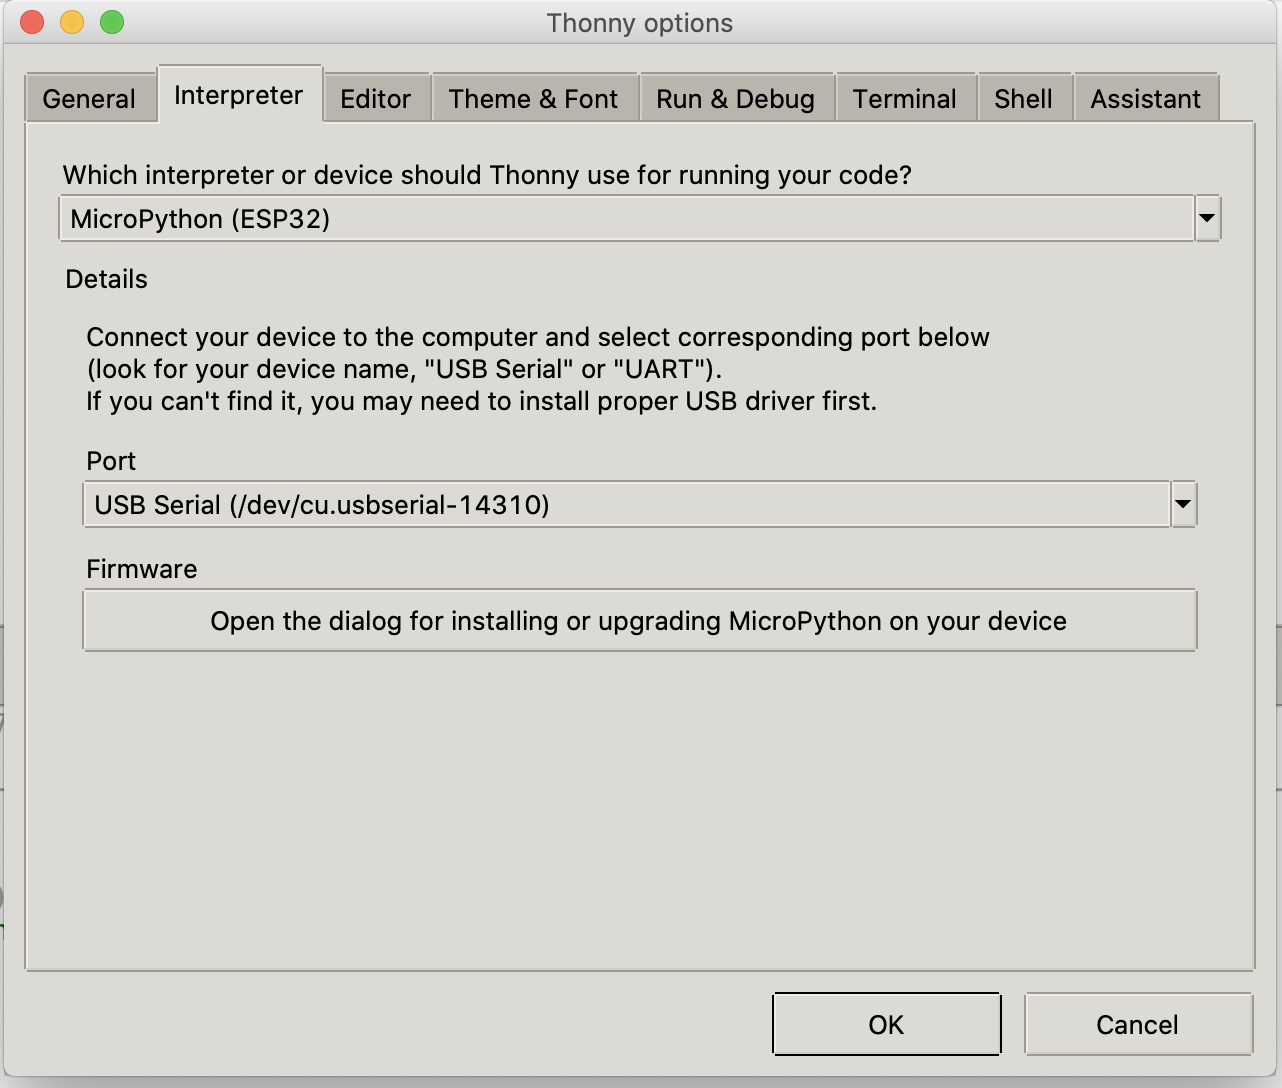
Under Thonny -> Preferences you will find a tab called interpreter like this:

In the interpreter make sure to choose MicroPython (ESP32) because that's the one we are using and in the port you should see USB Serial port, choose the one that is suitable to the Eduponics Mini device and not any other device that is connected to your system.
Press OK to save the settings.
Hello world
Now when everything is ready - it's time to run our first command to make sure everything is working.
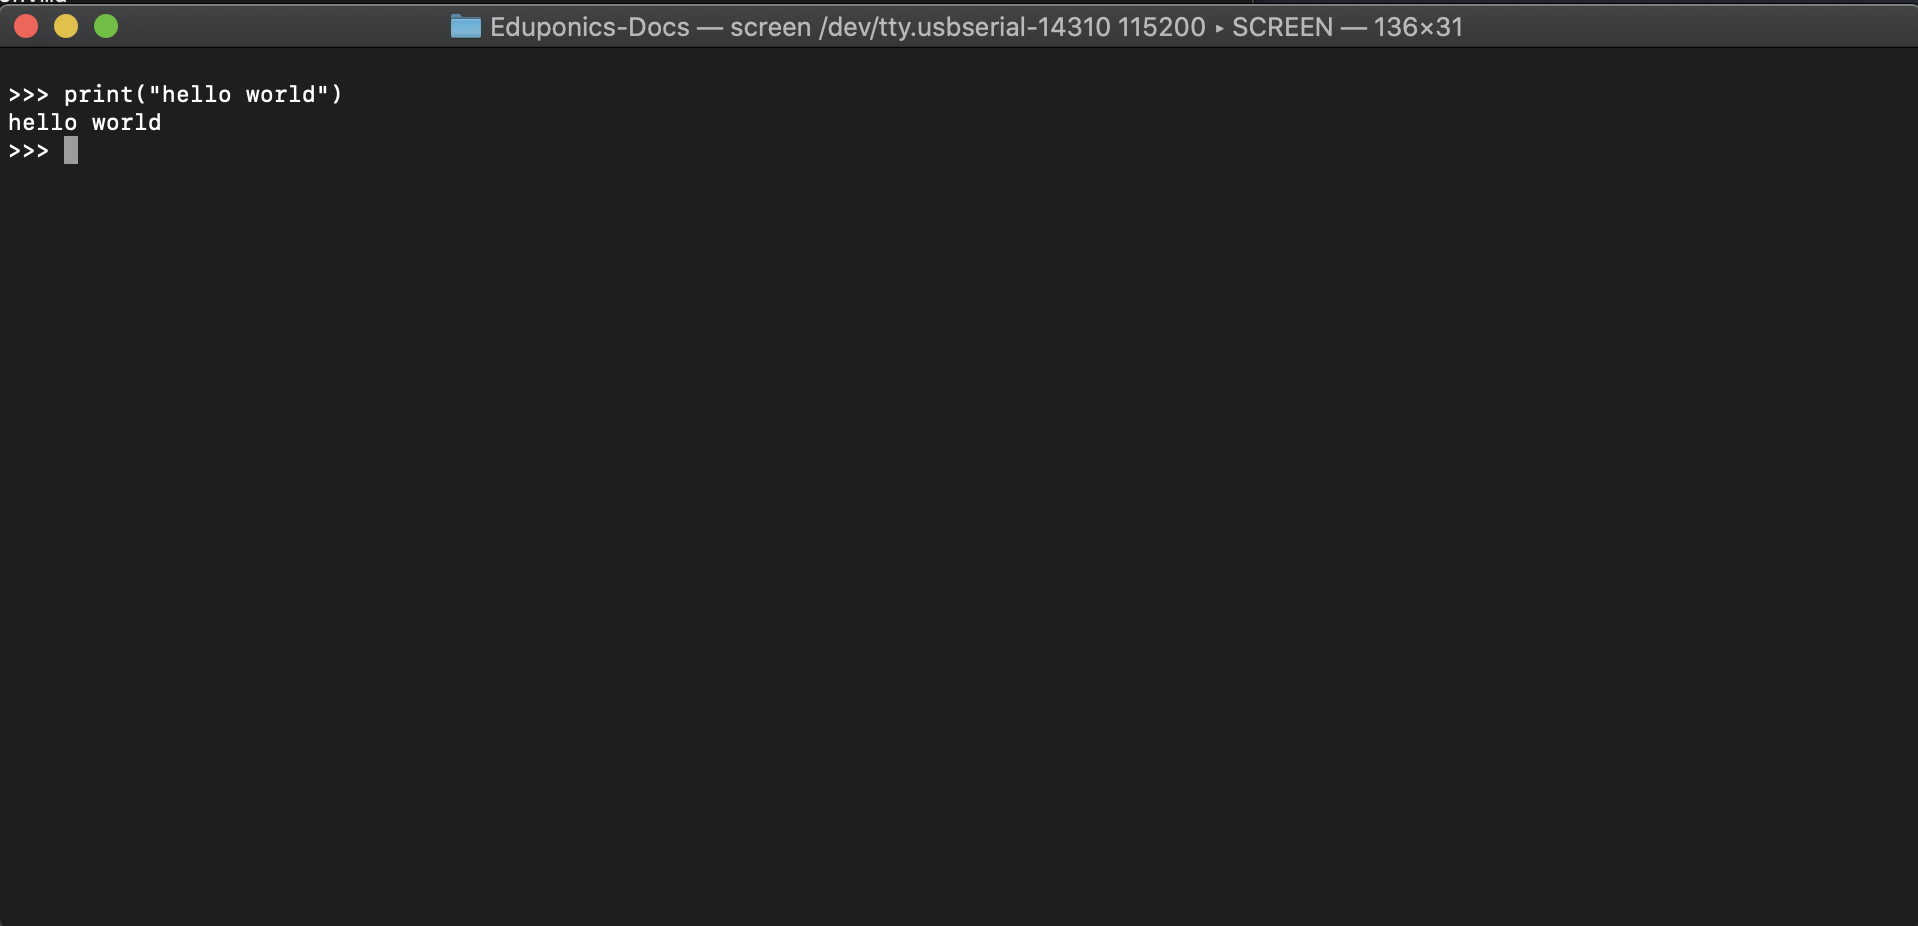
In Python, we use the "print" command to print something into the terminal (or console if you are on windows) to run the hello world command - type the following into the putty window or your terminal after connecting to the USB UART using the "screen" command:
print("hello world")

if you are using Thonny IDE, on the bottom of the IDE, once you've connected your ESP32 Eduponics kit successfully, you should notice something similar to:
"MicroPython v1.13 on 2020-09-02; ESP32 module with ESP32".
Now every line of code you'll write will be directly executed on the Eduponics mini ESP32 microcontroller.

Once you've typed the command and pressed "Enter" you should see "Hello world" on your screen! well done!
Command is executed on the ESP32 not on your machine
Once the "hello world" printing command was successfully executed, be aware that it was executed on the ESP32 Eduponics Mini board directly!
Your machine may or may not have Python3 installed but the code through Thonny is running on the development board directly which means we can continue to code more exciting things and explore all the feature the Eduponics Mini prepared for us!
Installing micropython-eduponics Library
In order to ease things up, we've created a special library MicroPython for the Eduponics Mini and the Eduponics Mini extension board.
The library can be found on our Github account: Micropython-Eduponics on github
This library will allow us to use different type of functions with ease without the need to drag external dependencies and libs to the ESP32 board. If you are planning on using Arduino IDE environment, you can ignore the following steps.
We will install the library through upip which is a MicroPython implementation of pip, python package manager. In order to do that, we first have to connect to the WiFi, we can do this by creating a file called boot.py on our Eduponics Mini device inside Thonny IDE and adding the following lines:
import network
import esp
esp.osdebug(None)
import gc
gc.collect()

ssid = 'WIFI_NAME'
password = 'WIFI_PASSWORD'

station = network.WLAN(network.STA_IF)

station.active(True)
station.connect(ssid, password)

while station.isconnected() == False:
  pass

print('Connected to WiFi successfully, IP: %s' % station.ifconfig()[0])
We need to make sure to change WIFI_NAME and WIFI_PASSWORD to your Access point at home (WiFI credentials), make sure that the WiFi is 2.4GhZ and not 5G as the ESP32 currently doesn't support 5G wireless networks.
Once the ESP32 is successfully connected to the WiFi and received IP address, we can write the following commands:
import upip
upip.install("micropython-eduponics")
This will import upip and using the command upip.install() we can install the micropython-eduponics library. Now once everything is ready, we can import eduponics library and time and use the API to ease our programming experience and tasks!