Submersible 12V external pump
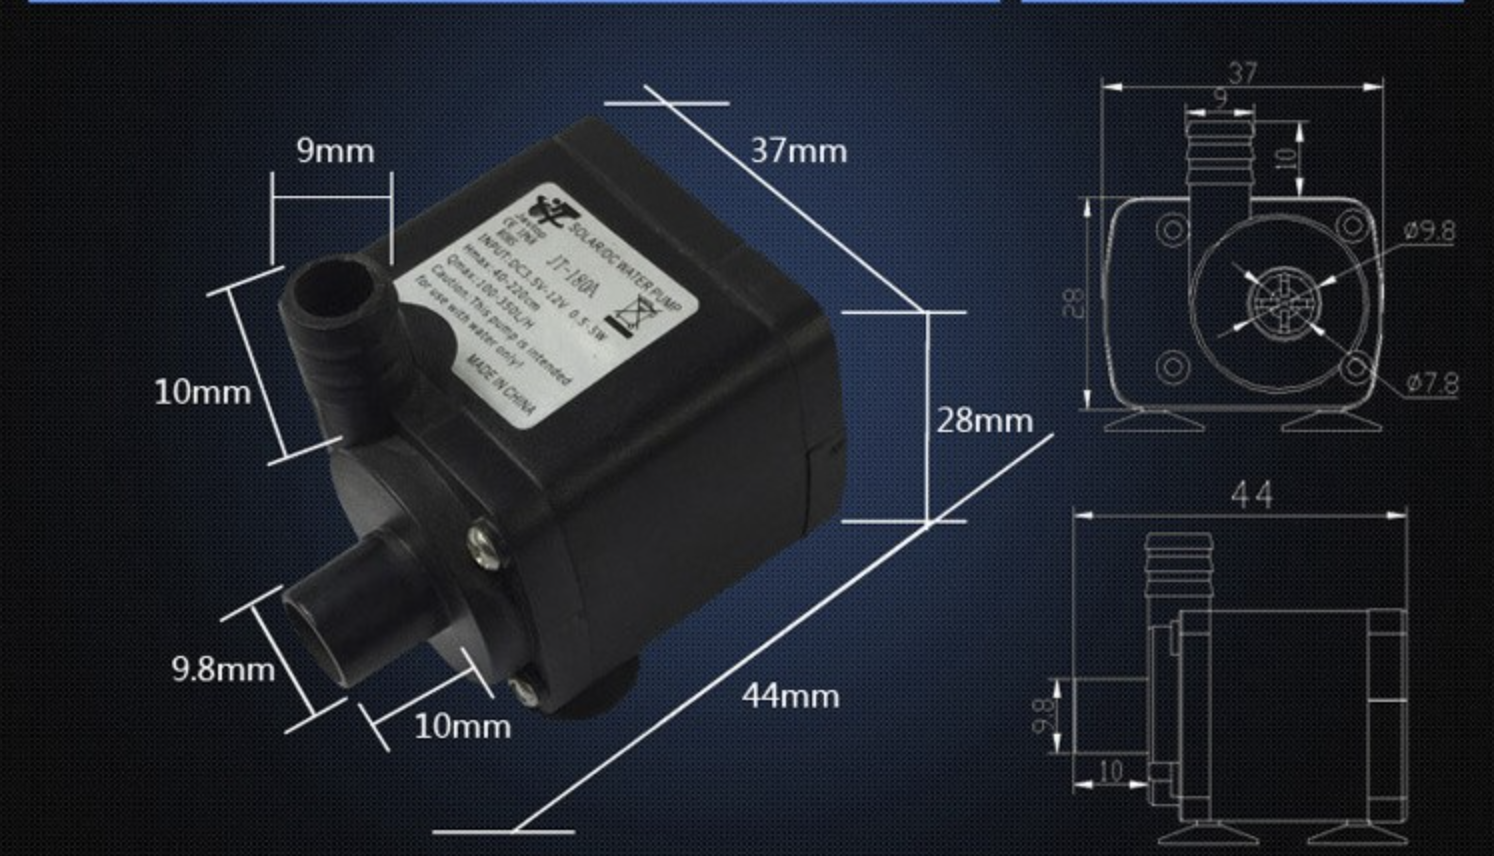
With the Eduponics mini kit you'll find a small 12V submersible external pump as an accessory
In this topic we'll learn about the pump, it's usage and possible applications and why we need a piece of hardware called "relay" to operate it.
At the end, we'll write a small Python code that will allow us to control the relay, activating the pump and delivering water from our water container to our plant.
Submersible usage only
The pump is a 12V submersible pump, do not try to power it when the pump is outside of the water. Only use the pump when it's fully submersed underwater in order to avoid damaging the pump. We've included water quantity sensor in the kit which you can use to check if there is enough water in the container or not.
12V DC is required for full operation
while 5V USB Type-C might work for you, it won't have enough power to pump the water through the entire hose. make sure to use the DC 12V power supply when operation the kit on production work.
Specifications
The pump is top quality product designed to live long and operate well under any conditions.
- Pure cooper wired motor, stable and consistent.
- Long lasting working life.
- High resistance turbine produce stable water circulation
- Low power consumption, 2W equal to 5W (same current, more power)
- High temperature resistance
- Made from recycled plastic materials
- Complete waterproof and safe to use for long term submerged applications.
- Silent design, doesn't make too much noise.
Possible applications
Pumps have many useful applications, our pump particularly is a Submersible pump which means it can only operate under water. there are other pumps that can operate in air but cannot be submersed under water such as air pumps.
Possible applications for pumps are:
- Watering plants and flowers
- Moving liquids from one location to another
- Filling a fish tank or other container with water or liquids
- To empty the water or liquids from a container / tank
- Interactive water fountain
- Circulating the water making sure it doesn't stand still (Hydroponics for example)
Relay principle explained

The 12V pump is operated using a 5V relay, we use 5V output signal to activate (open) the relay or to deactivate (close) the relay.
when the relay is open, the circuit of the pump will close and allow current to flow thus activating the pump and letting us pump water through it.
when we close the relay, the pump circuit is interrupted result in inactivating or disabling the pump.
A relay is an electrically operated switch. Many relays use an electromagnet to mechanically operate a switch, but other operating principles are also used, such as solid-state relays.
Our relay is based on the electromagnet principle, Relays are used where it is necessary to control a circuit by a separate low-power signal, or where several circuits must be controlled by one signal.
Without the relay, we won't be able to control the pump for the reason that our ESP32 development board IO pins can only supply 3.3v of output while our relay requires 12V of output.
The relay we use is HFD3/5, you can find more information here: HFD3/5 datasheet
Connecting the pump to the kit
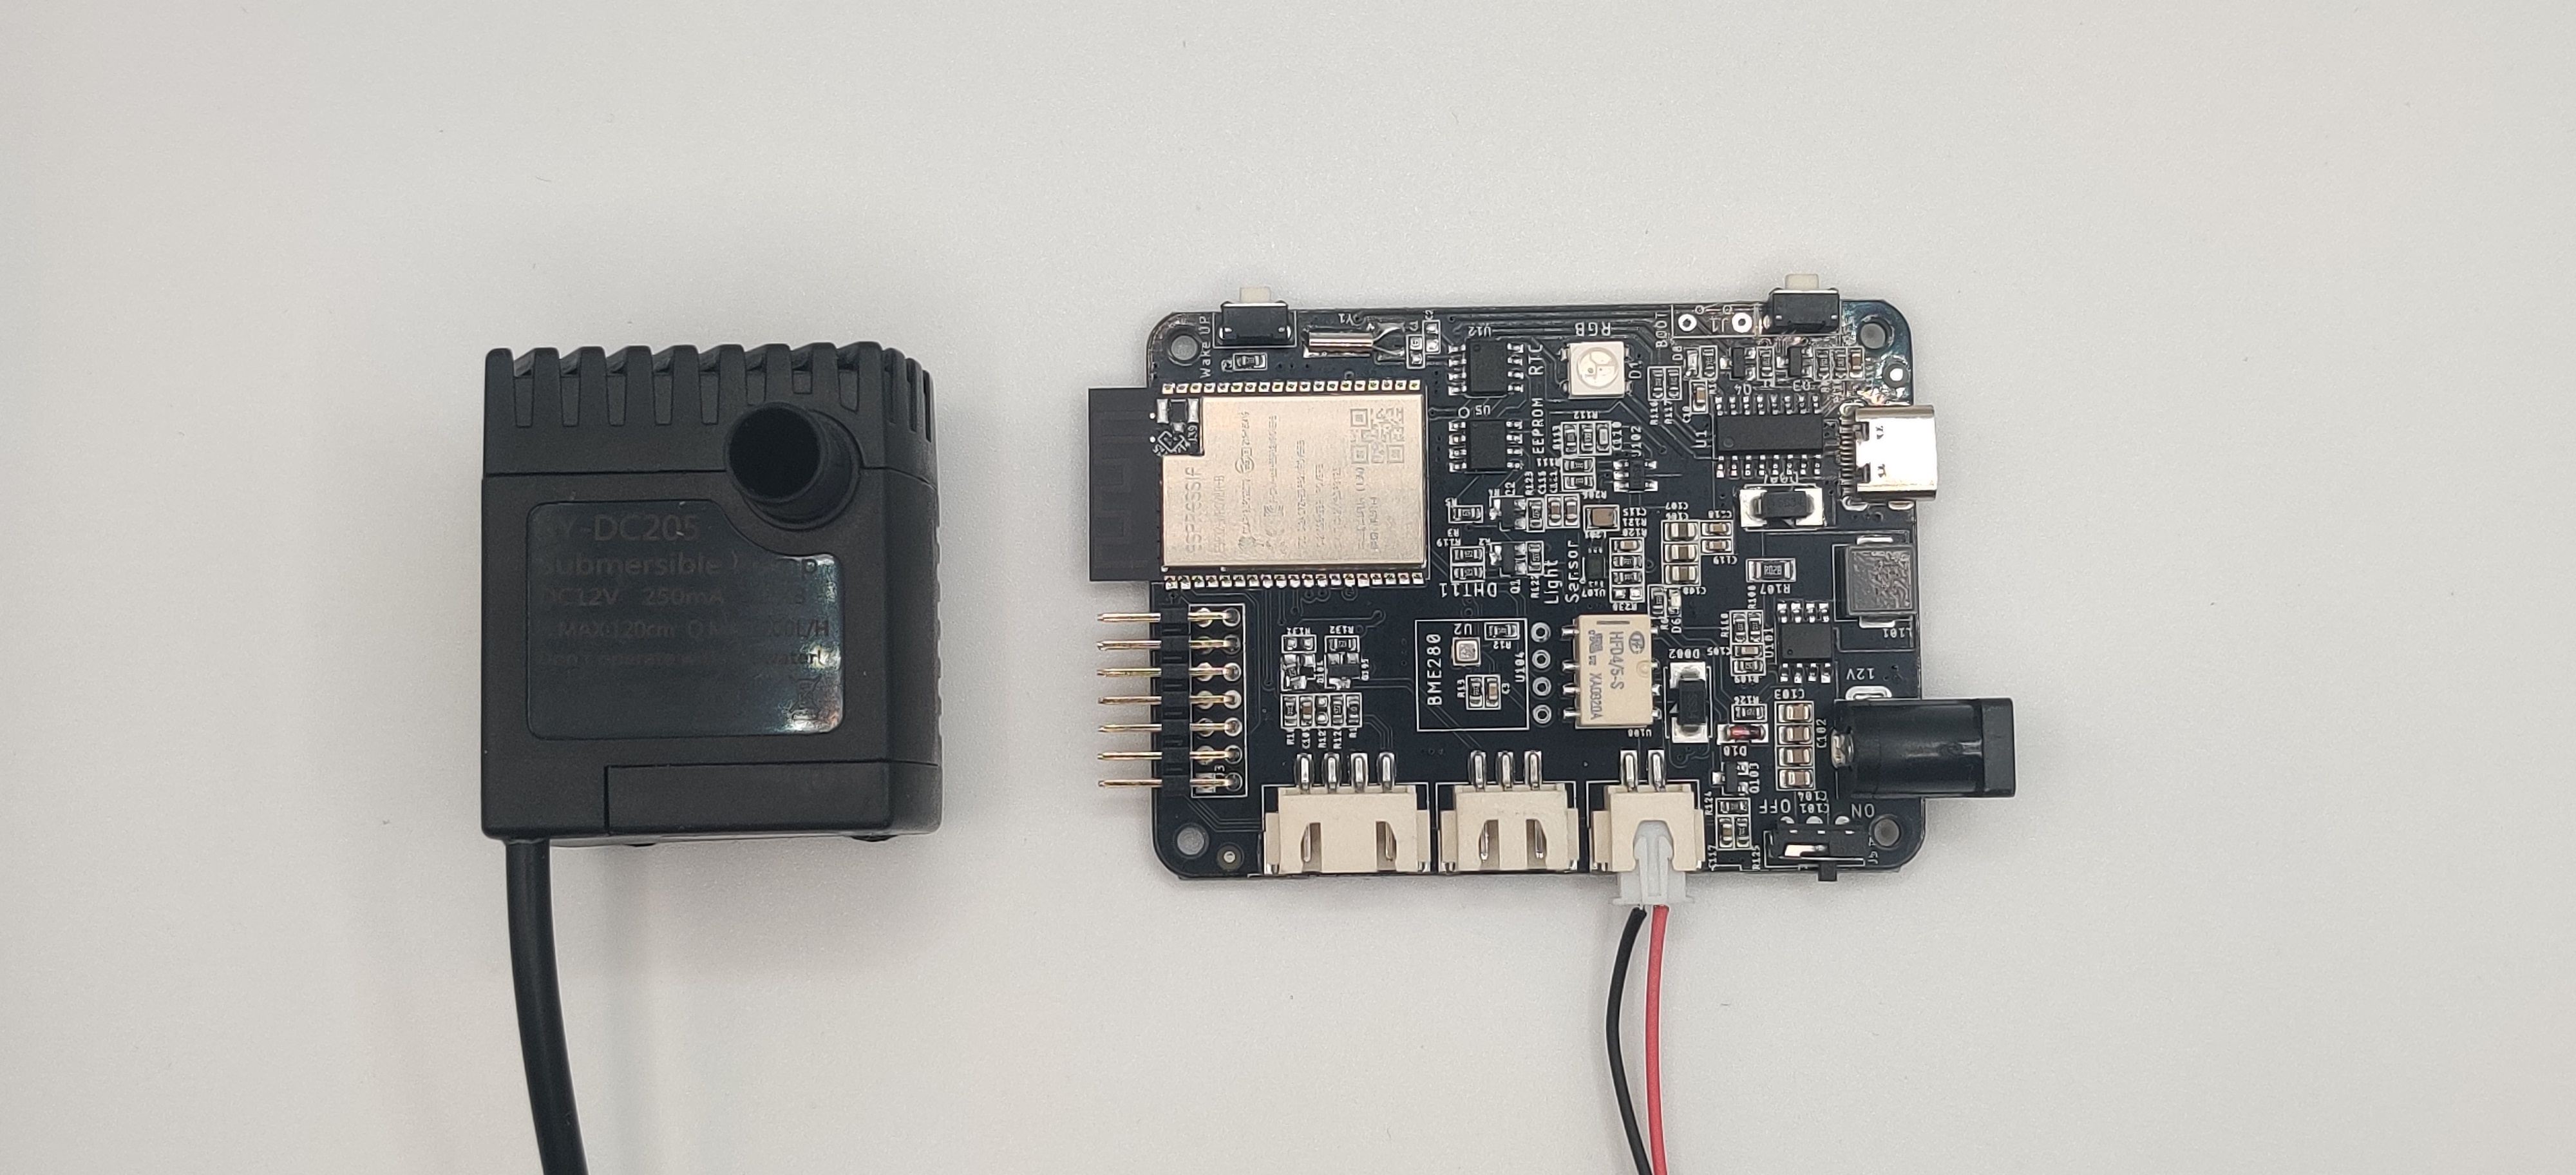
The pump interface is our standard XH2.54 interface with 2 pins.
to connect it, we'll simply plug the pump into the right port at the board, that should be easy because the board only contains single 2 pin interface which is dedicated for the pump.
Then, we'll need to take the hose and connect it directly to the top side of our pump, the water will go through it directly to our plant.
Make sure to connect the hose to the top side of the pump, the left side is the water input direction while the top side is the output.
Preparing the environment
As our pump is submersible, we must put it inside of our water container. it can be anything, a plastic bottle or a box, make sure to fill it with water and don't worry about the pump - it's completely waterproof!
The pump is waterproof, the Eduponics mini board is not
Make sure not to accidentally water the development board or any sensors included with it, only the pump itself with the wire can be submerged underwater.
Software explained
If we want to control the pump, we need to control the relay. the relay will behave as a "gate" that we open or close to allow the pump take water from the container and pump it through to our plant.
for this code we'll need to import 2 libraries: machine and time.
The machine library will allow us to control the IO pins while the time library will allow us to use the sleep function to take a small break between opening and closing the relay.
The relay is connected to ESP32 IO pin number 23, because we "tell" the relay to either close or open, we'll set the pin as OUTPUT.
Then what left to do is turn on the pump (by opening the relay) using .value(1) command and closing it after a while using .value(0)
The .value() function setting the IO output signal to either 1 which is "open" in our case or 0 which will be "close".
Check the complete code below and try it for yourself, you can change the sleep_interval variable with different number to let the program sleep for longer or shorter during the opening and closing of the relay.
import machine
import time

# define pump on pin IO23 as OUTPUT
pump = machine.Pin(23, machine.Pin.OUT)
# define sleep interval as 3 seconds
sleep_interval = 1

# turn on the pump
pump.value(1)
# wait for the defined sleep interval
time.sleep(sleep_interval)
# turn off the pump
pump.value(0)
// set the pump on IO pin number 23
const int pump = 23;

void setup() {
  Serial.begin(115200);
  // configure pump as output
  pinMode(pump, OUTPUT);
}

void loop() {
  // when pump on low the relay is closed, no water is going through
  digitalWrite(pump, LOW);
  Serial.println("Relay is closed");
  delay(1000);
  // if the pump is high, the relay is open, the water goes through
  digitalWrite(pump, HIGH);
  Serial.println("Relay is open");
  delay(1000);
}